When my son was a sophomore in high school and joined indoor percussion, I kind of did, too. The group needed someone to help with “the floor.” I didn’t know what that was. I was told it was a 60 x 90 tarp used in performances. I envisioned inches, like a rug. No, it was feet—as in a gym floor—and they perform on it.
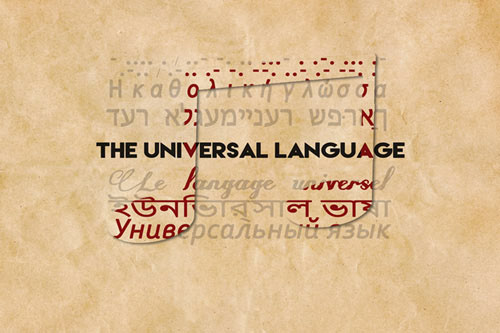
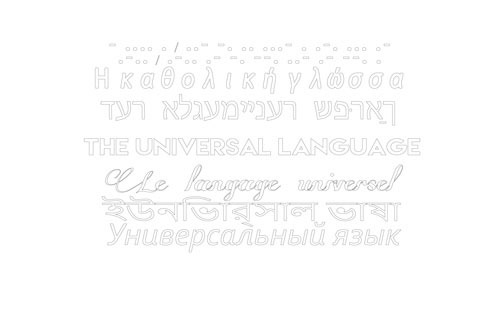
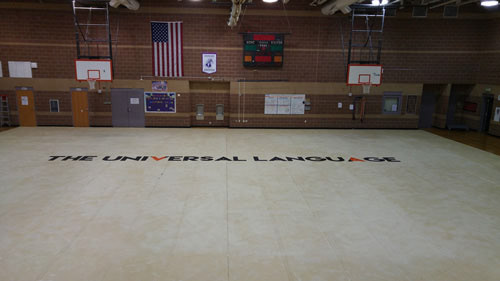
The show theme was The Universal Language, and Percussion Instructor Steve Turney's floor design featured the name in seven different languages: Morse code, Greek, Hebrew, English, French, Punjabi, and Russian with musical notes as a color variation on the text all on a background resembling parchment.
I can hand-draw letters, but not this many… on this scale... at least not before the season would end. It would have looked great digitally printed, which a lot of indoor percussion groups do, but those cost about $5,000. We had about $650 to paint a used, gray tarp. So I had to figure out how to transfer the design quickly and inexpensively.
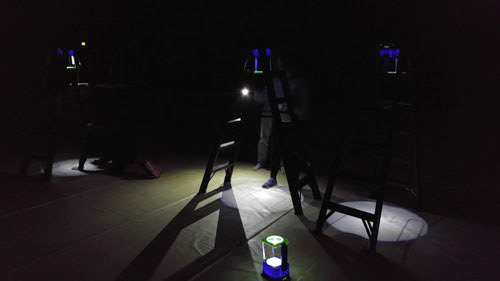
I’ve previously projected art onto walls to paint, but a tarp this size weighs about 300 lbs. It isn’t something easily hung on a wall. Then I thought about rigging a projector from the ceiling in the gym, but getting it situated and bright enough to transfer wouldn’t work.
I thought about stencils. I looked into makerspaces where a vinyl or laser cutter might work, but the cheapest I could get materials was $425. If we went that route, we wouldn’t have much budget left for paint.
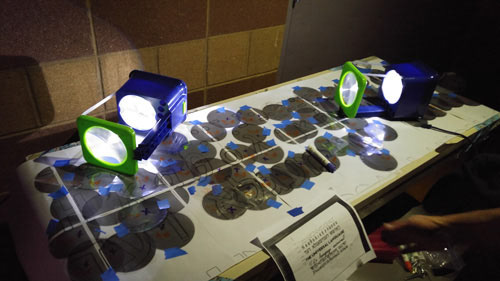
Then I figured it out. I had previously bought multiple toy projectors for another project. I got them on Cyber Monday—they had cost $7 instead of $20 each!
They’re like miniature overhead projectors. I had already made my own circle template in Illustrator for that project where I could print three discs on a transparent sheet.
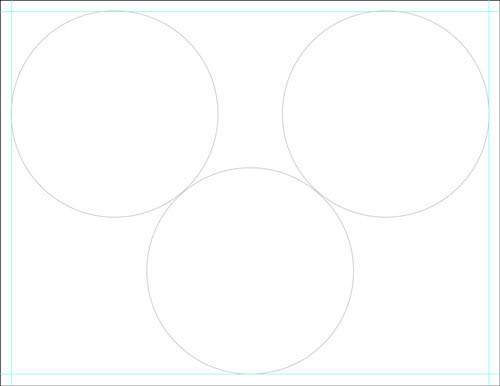
Not to turn this into an Illustrator how-to but I took the design, converted it to outlines,
overlapped circles for registration,
duplicated the content to make individual discs, and used the circles for clipping masks.
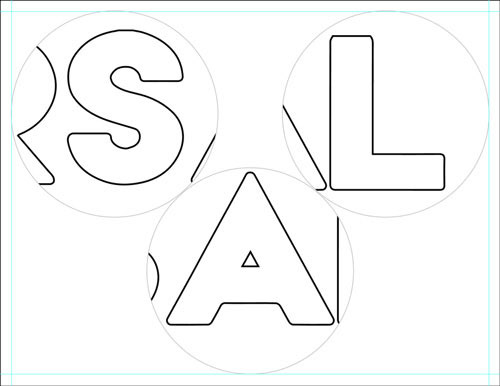
I determined the circle size in relation to the design in order to display the correct size when duct taped underneath and projected from a ladder.
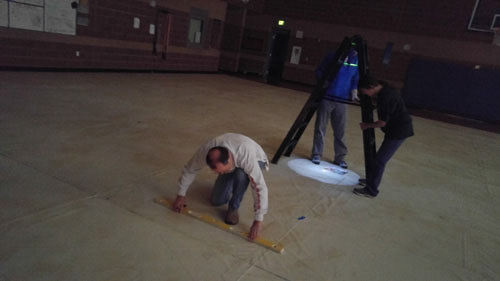
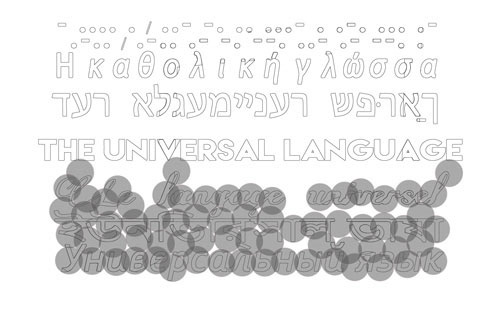
With the baselines marked, we started transferring the design from the center and worked outward like laying tile. We used three identical ladders from the marching band, and positioned them to overlap the circles for placement.
Parents helped trace the characters with Sharpies, and other parents came to help paint the traced letters.
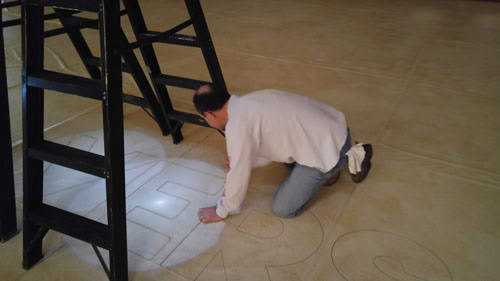
After the only line of English in the design, the transfer got trickier.
I printed the portion we were tracing and taped the prepared discs to the tiled layout.
I used an orange dry erase marker to add arrows indicating which way was up.
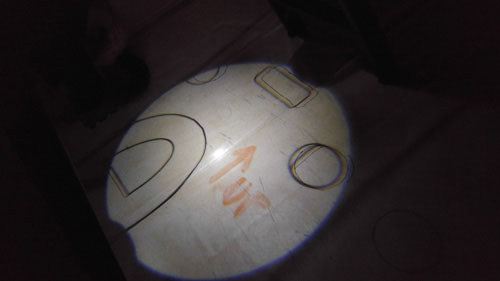
I marked the ones we’d done with a purple X. After the top three lines were traced, we did the bottom three lines, and parents painted where we weren’t tracing. We had to have the lights out to see what was being projected.
We had several “painting parties.”
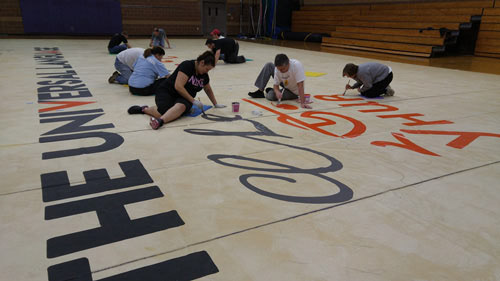
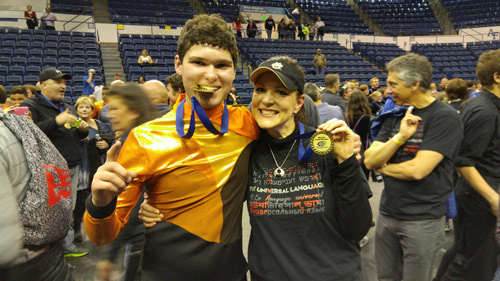
It took some time, but it was all worth it when it was finished. This usually rambunctious group of drummers was uncharacteristically silent when they saw the finished floor. They climbed to the top of the bleachers, got out their phones, and took pictures.
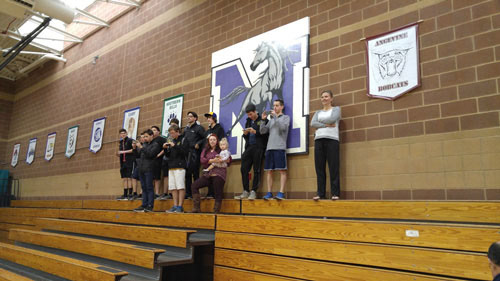
The students won the State Championship, competed at nationals, where the floor was frequently mistaken for a digital print, and advanced to semifinals, competing against big budget schools.

To me, it was a win for creativity. The design transfer took Illustrator, $15 worth of transparencies, and a little ingenuity. Sure, what we produced was a painted tarp, but what we really made were memories.